Create AttackEC2
Create EC2 AttackEC2
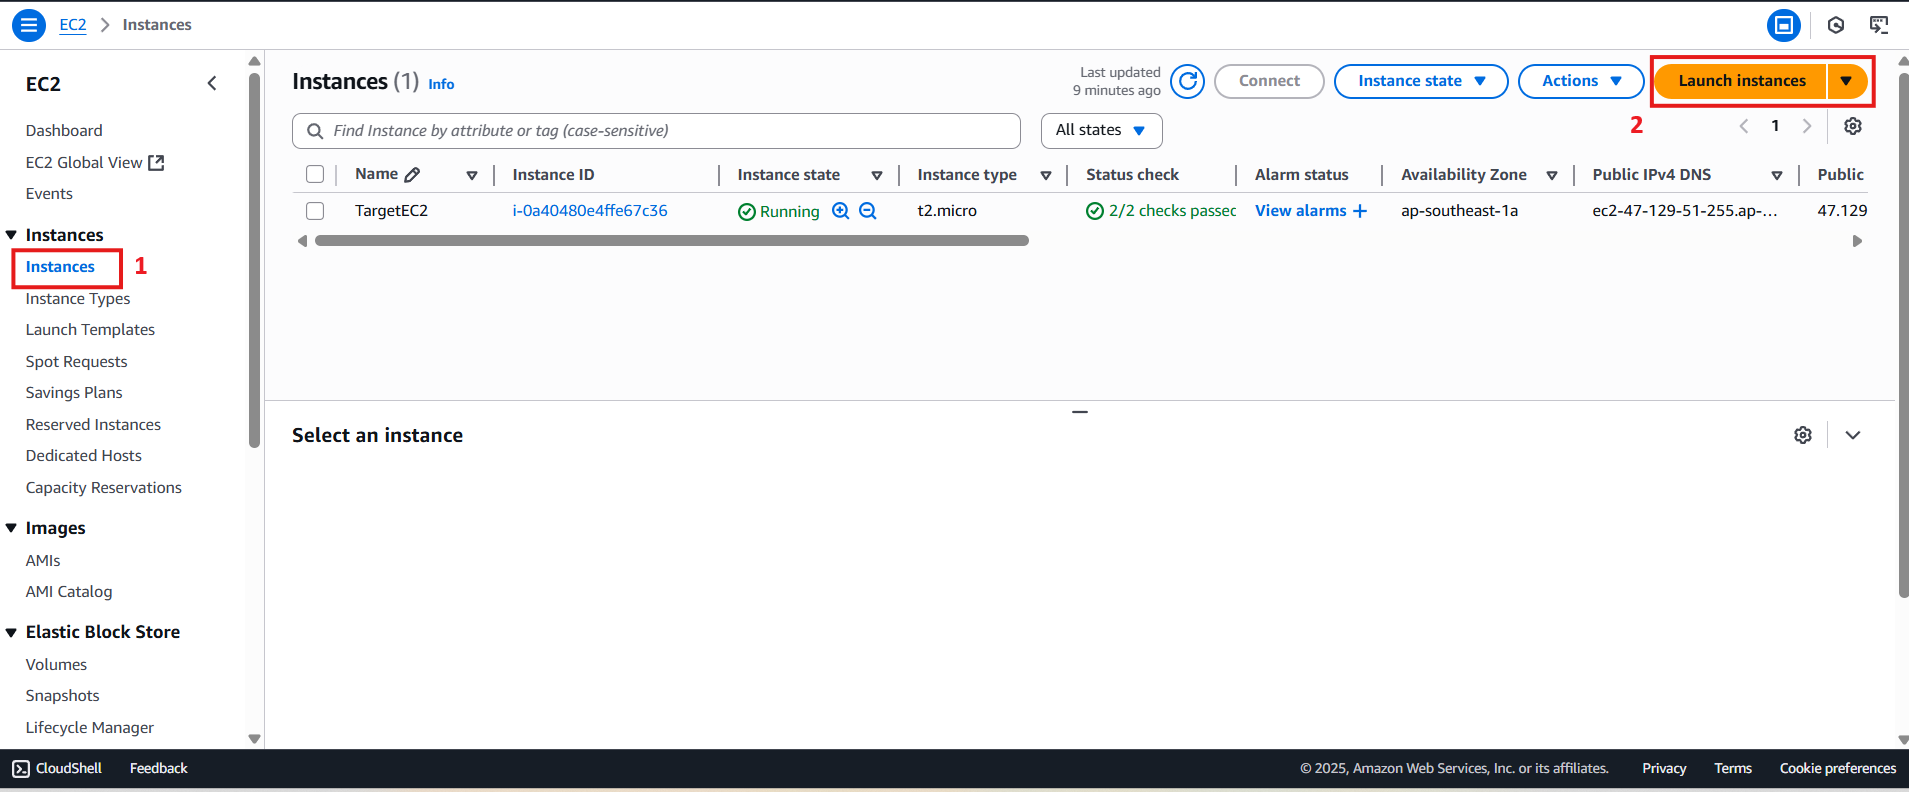
Access the AWS EC2 Console to start the process of creating a new EC2 instance.
- On the EC2 console screen, select Instances and click Launch instances in the top right corner.
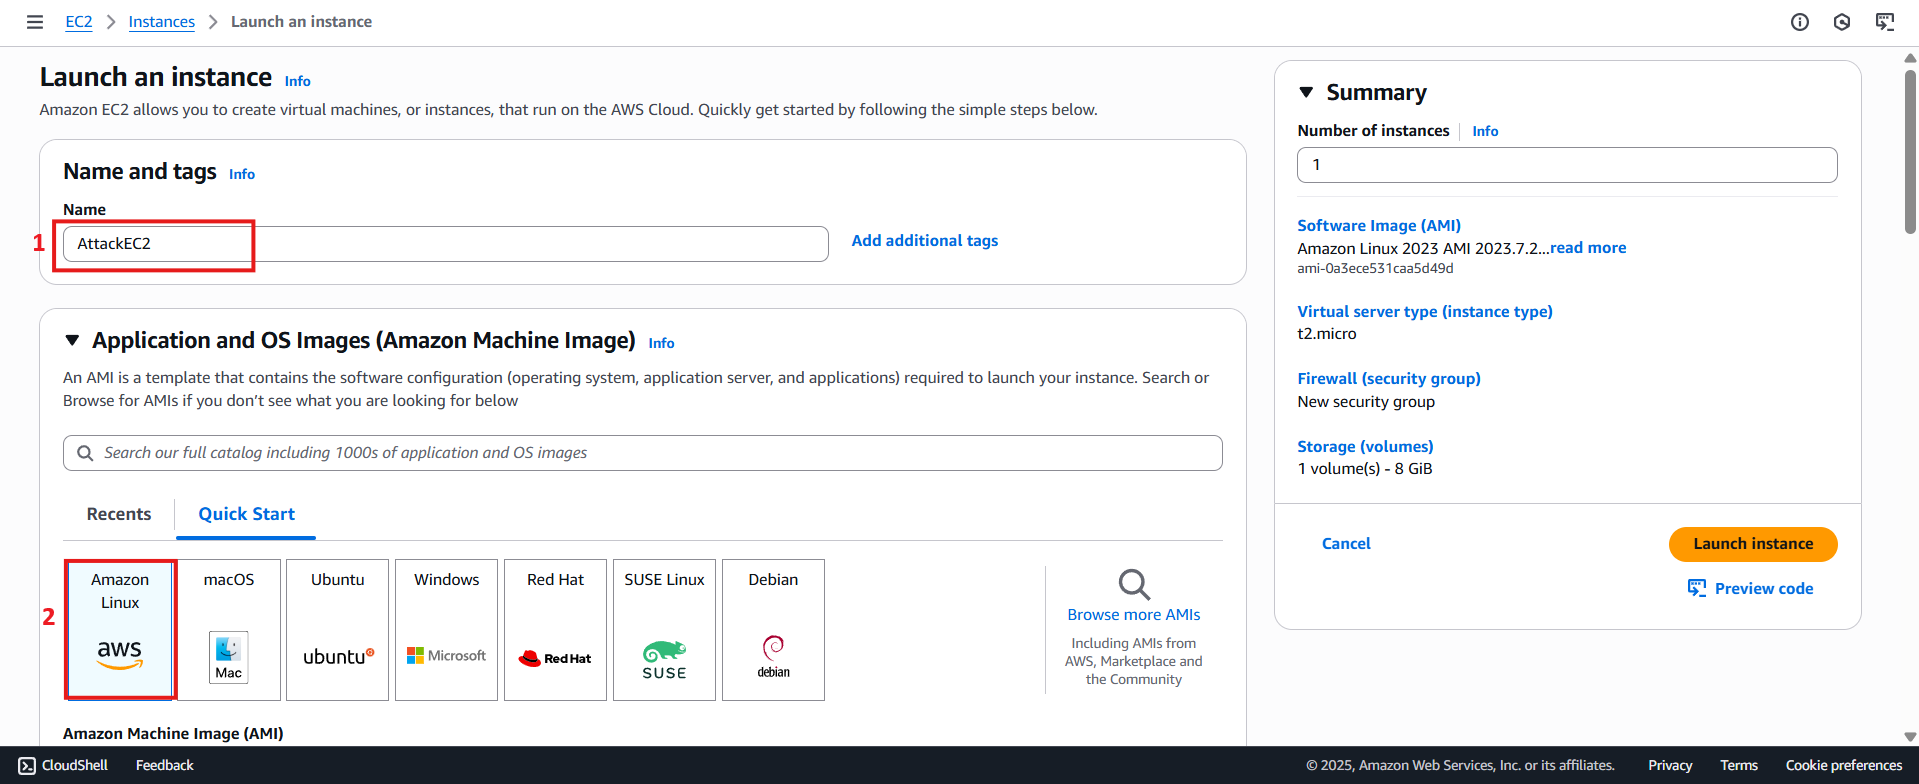
- In the Launch an instance screen:
- Choose a Name for the instance as
AttackEC2. - Select Amazon Linux under Application and OS Images (Amazon Machine Image).
- Choose a Name for the instance as
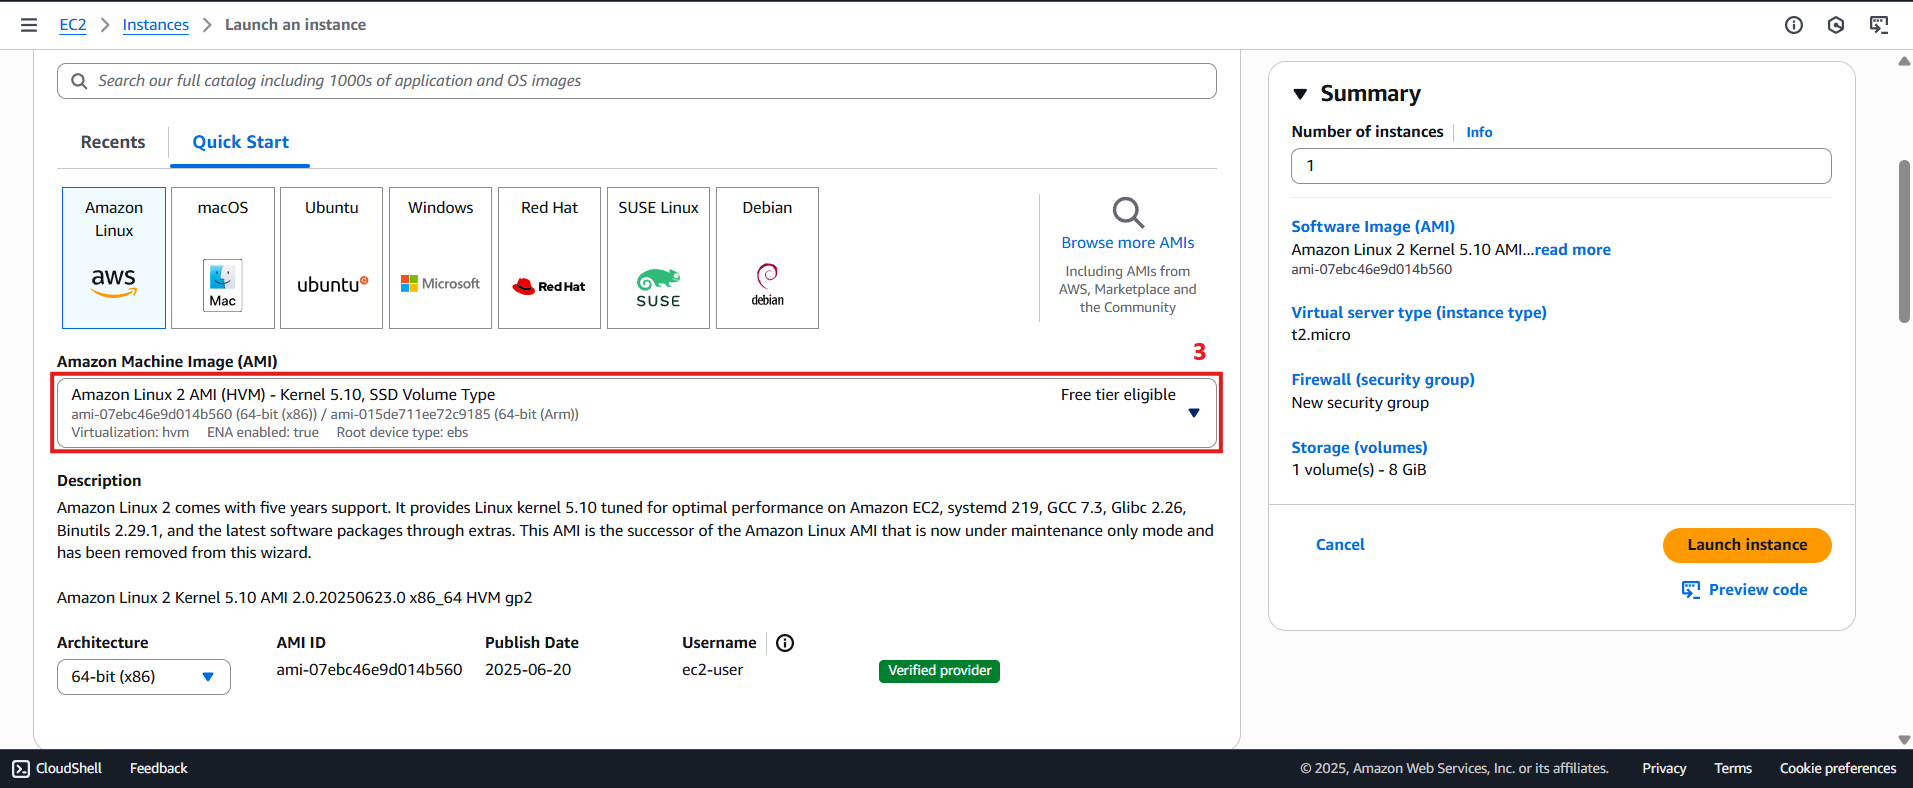
- In the Amazon Machine Image (AMI) section:
- Click Select to choose the Amazon Linux 2 operating system.
- Choose Amazon Linux 2 AMI.
- In the Instance Type section:
- Select t2.micro (for Free Tier usage).
- Click Create new key pair in the Key pair (login) section.
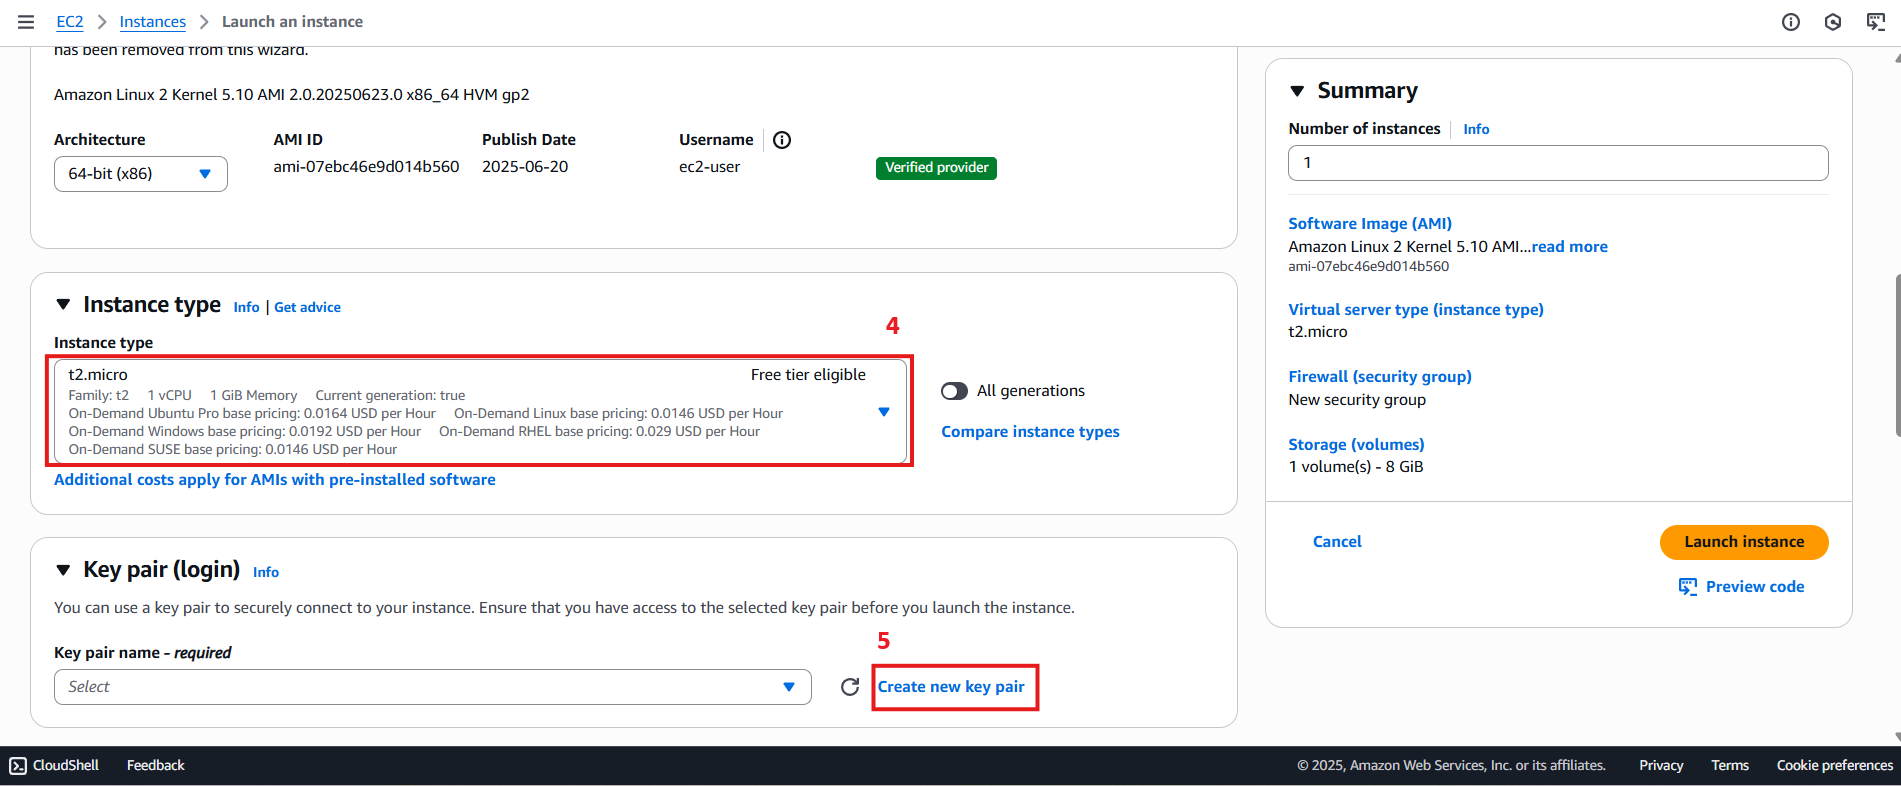
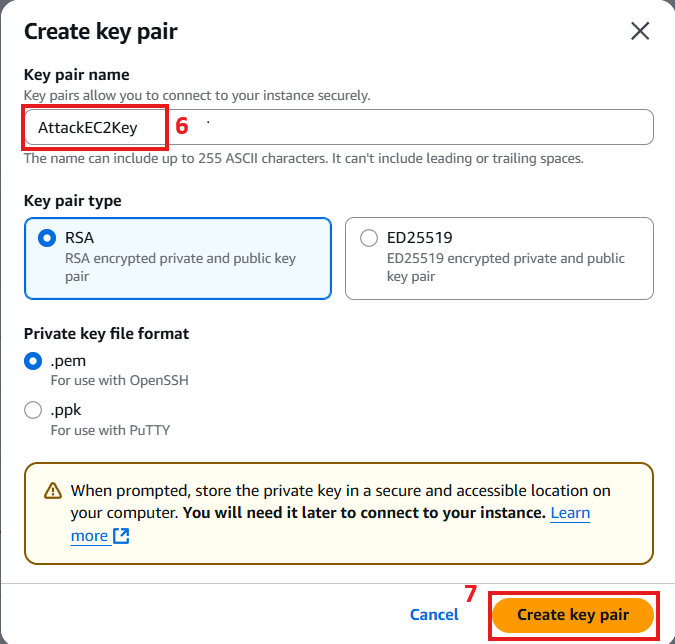
- In the Create Key Pair section:
- Enter Key pair name as
AttackEC2Key. - Select RSA for Key pair type.
- Choose .pem as the Private key file format (to use with OpenSSH).
- Click Create key pair.
- Enter Key pair name as
-
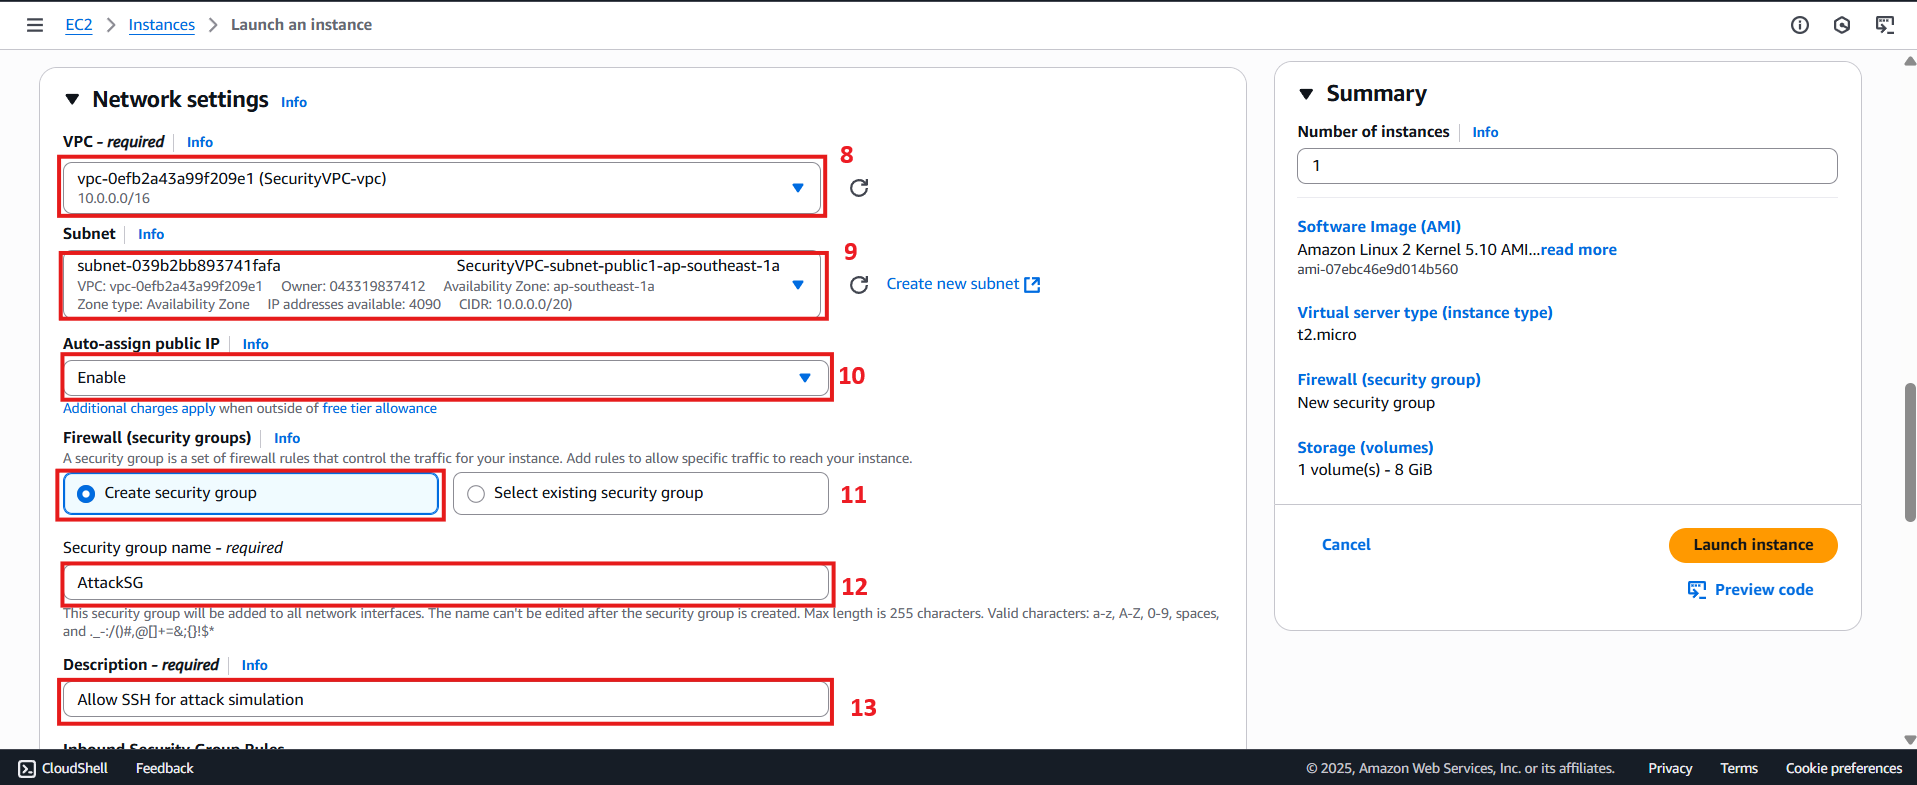
In the Network Settings section, click Edit:
- For VPC, choose SecurityVPC.
- For Subnet, choose SecurityVPC-subnet-public1-ap-southeast-1a.
- Ensure Auto-assign public IP is selected as Enable.
- In the Firewall (security groups) section:
- Click Create security group.
- Enter
AttackSGas the security group name. - Description:
Allow SSH for attack simulation. - Configure inbound rules with SSH to allow access from 0.0.0.0/0.
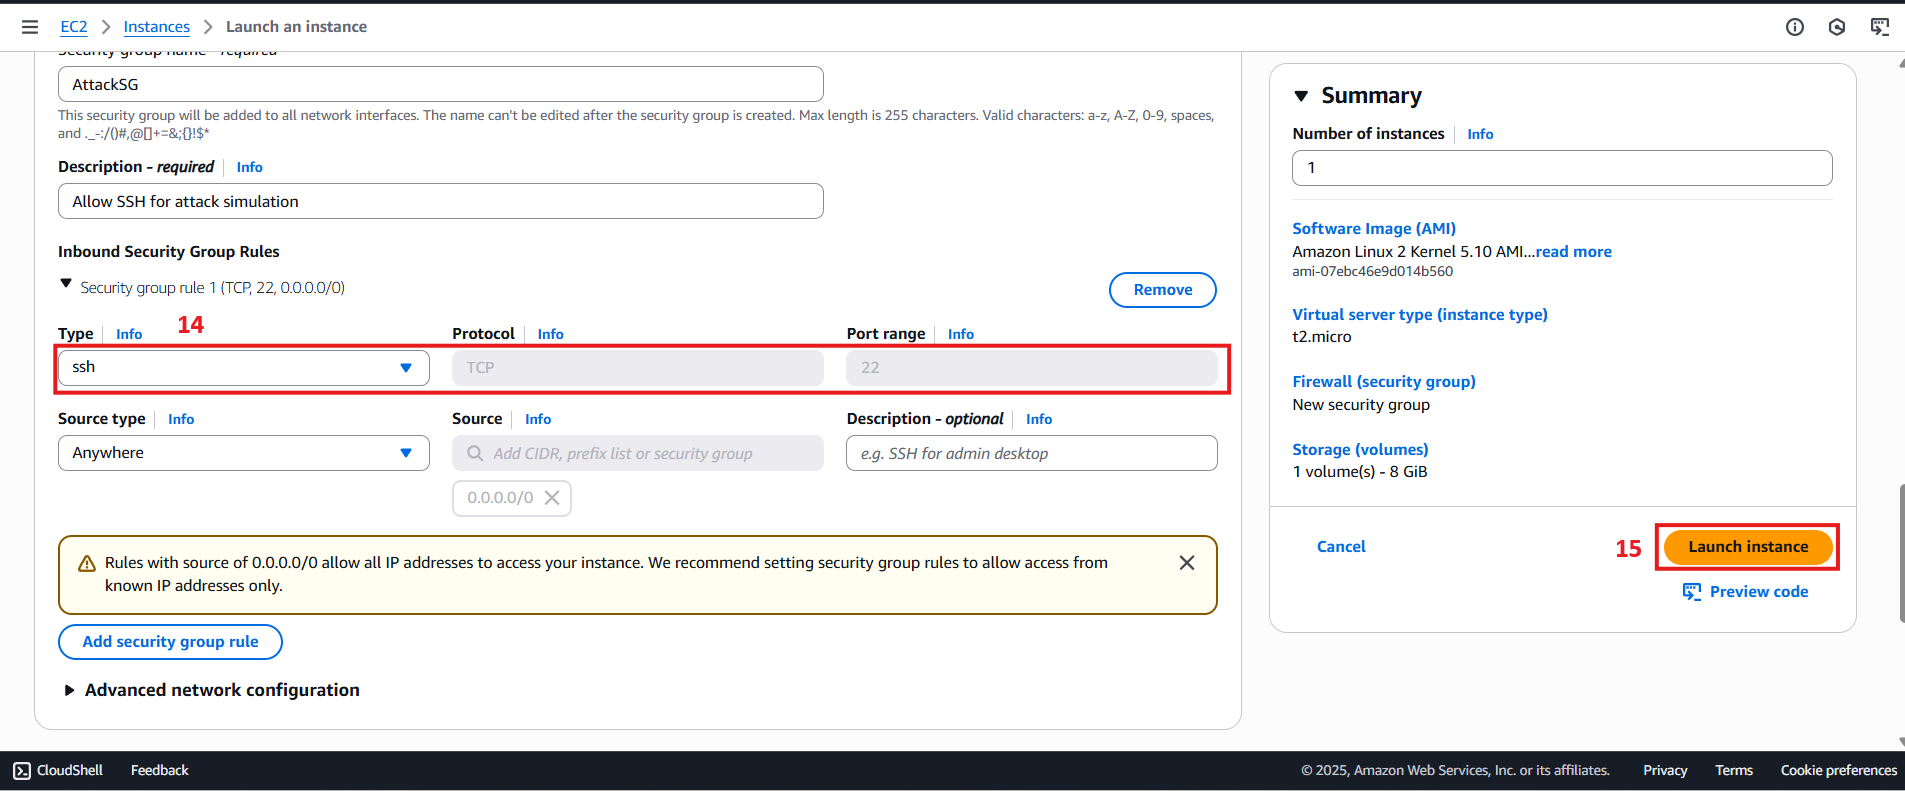
- In the Inbound Security Group Rules, in the Network Settings section, add a new rule:
- Type: Select
ssh. - Protocol: Select
TCP. - Port Range: Enter
22. - Source: Select
Anywhere(or enter0.0.0.0/0to allow all IP addresses). - Description (optional): You can enter a description like
SSH for attack simulation. - Once completed, click Launch instance in the Summary section to initiate the EC2 instance.
- Type: Select
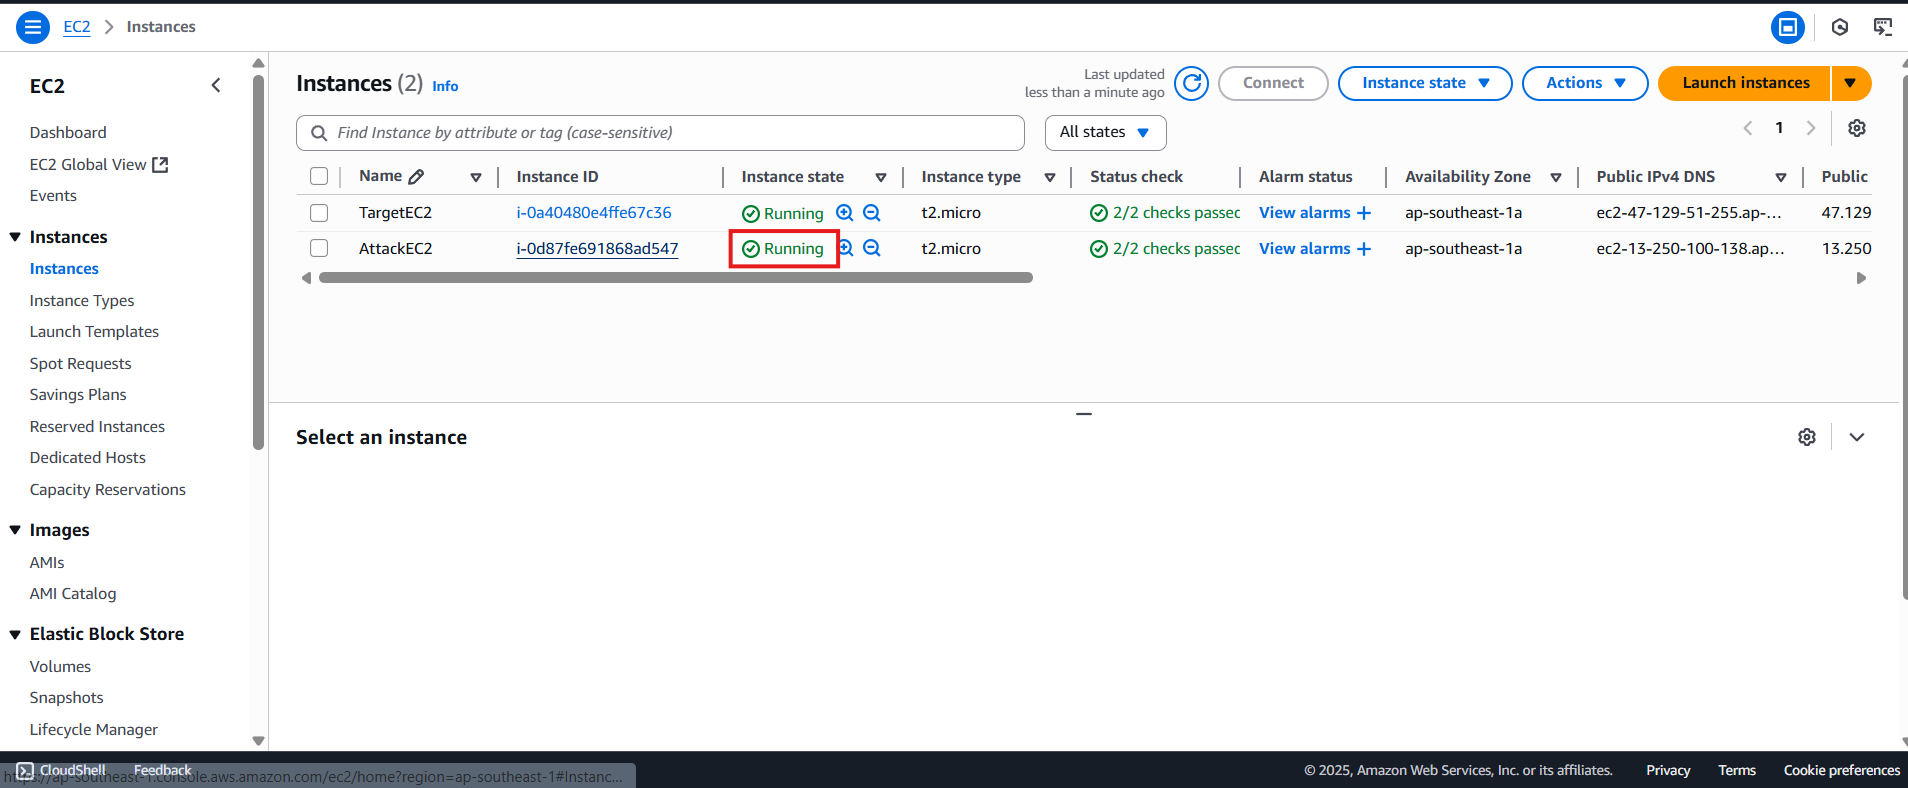
- After clicking Launch instance, wait for 1 to 2 minutes. The status of the EC2 instance will change to Running, indicating the virtual machine has been successfully created.